Fisherman's Bay fidelity. Map Fisherman's Bay - World of Tanks game tactics. Video with LT positions - Rybatskaya Bay
(city) and (village). The size of the map is 1000 by 1000 meters, and the level of combat is from 4 to 11. It perfectly combines large open spaces and narrow labyrinths of streets. Any technique will find a place here. The tactics on this map are quite banal, but there are just a lot of solutions. On the map in large quantities are a variety of shelters, both relief and buildings. Conventionally, the map can be divided as follows: hill, alley, village, city and island. Let's analyze each of these zones separately.
Approximate siding routes for all types of vehicles.
Red dots are art.
The green areas are the location of the PT.
Red areas are hot spots, the main battlefields.
Yellow arrows - direction of attack ST.
Blue arrows are directions of TT attack.
Hill- This is the location of the first team. Often she gathers all there. From this zone, the city and the village are perfectly shot through.
They feel comfortable on the alley. There are plenty of hiding places where they can fire without being seen. They also like to ride along the alley located on the first line. It is not very difficult to break through the defenses of both the first and second teams in this area, which often leads to the loss of artillery of the first team.
Tactics on the map Fisherman's Bay.
The village is the meeting place for ST and LT. This is the most short cut to the enemy base, and if you start moving here in the first seconds of the battle, then there is a chance to illuminate the enemy’s artillery, which has not yet managed to take a position.
The city is a favorite place for fighting. A lot of houses make it possible to hide from the fire of enemy artillery and it is more common for heavy forces to conduct street battles.
The south base is the location of the second team. There is a small hollow there, which gives good shelter from the light from the village and the city.
Tactics.
I think it's not worth talking about tactics for different respawns, they are almost the same. But there are still a couple of differences. The first team is best to attack through the city. Art of the enemy sees badly there and this significantly increases the chances of a successful breakthrough. Moreover, the enemy artillery itself is located very close to the city. The city must be stormed by heavy tanks. ST has a different role. They, under the cover of PT, should rush along the alley to the enemy base. The village in the center of the map should not be left either. 1-2 cords are quite enough there to cover the flank and rear of the tanks attacking through the city.
*Tactics of the game World of Tanks
For the second team, it is best to choose a defensive tactic. The alley should be covered with PT and 1-2 strands. These comrades will hold back the pressure of enemy STs. ST is better to send to the village. There they can light up artillery, or go to the enemy’s heavy forces in the city in the rear and flank. Heavy tanks of the second team should be sent to the city. Especially since they have a slight advantage. The fact is that from the side of the second respawn there are a little more covers and it is easier to attack from here. Moreover, the allied artillery sees the city quite well from the island.
That's all wisdom. I would advise it is better to use tank ambush tactics on this map. Plenty of hills and shelters provide an excellent opportunity for this. So keep it up. Good luck in the difficult tank business!
This map is a successful combination of open space and rugged terrain. The narrow winding streets of the port city, located on the flank, will help to unexpectedly gain an advantage.
Gentle hills with numerous bushes will allow extensive use of ambush tactics. The map was added in update 0.6.7. Name in the battle record file: fishing_bay.
Tactics
The game location is conditionally divided into three zones: an alley (greenery), a village (center) and a city (port). Alley - an open area in the west of the map. Terrain changes make it unsuitable for heavy tanks. Slow vehicles will be detected at a great distance and shot before they can get close.
Therefore, the classic route of a heavy tank runs through the city, located by the water in the east. City buildings provide reliable cover and the ability to get close to the enemy base without falling under artillery fire.
There is a village in the center of the map on a hill. The buildings here are also very strong and can withstand self-propelled guns. However, the position itself is very vulnerable to flanking fire.
Light tanks
Light tanks can break through to the enemy base from any of the possible directions. A classic example is the light from the village in the center. An alternative tactic is to "passive light" on the alley.
medium tanks
Medium tanks are distributed around the map depending on the preferences of the players. Usually this is an alley and a village, but if the player is more used to urban combat, he can send his tank to the city as well. At the first stage of the battle, STs intercept light tanks and occupy key positions. Then they fight at medium and long distances. At the end of the battle, the surviving STs are mobilized to break through the emerging gaps in the enemy defenses.
Heavy tanks
Heavy tanks traditionally clash in the city. Individual cars can also go to the alley.
Anti-tank self-propelled guns
Tank destroyers protect the approaches to the base. They mainly concentrate on the hill and near the church on both sides of the valley in the alley. In the event of a successful advance of the allies forward, tank destroyers can advance to the center. From there, in their sector of fire is most of the map.
Self Propelled Artillery
Self-propelled guns are usually located on a hill or outside the city, at the very edge of the map. Large slow self-propelled guns have a very high probability of being detected in the first seconds of the battle, so it is important to leave the open area at the base as soon as possible.
The map is very versatile, combining a large open space with a small central village and a port city on the outskirts. A lot of tactical bushes will allow the LT to take up convenient positions for passive and active illumination of the enemy.
Below is an image splitting the map by symbols and with the main LT positions on Rybatskaya Bay:
Let's analyze the key positions from the lower (southern) respawn:
E7(bush in the village)  Advantages:
- an excellent position of this spawn for highlighting the passing of tanks at the beginning of the battle, allowing you to shine the TT moving into the city, and in some cases illuminate the movement of the enemy’s self-propelled guns along the J line;
Flaws:
— a popular place, enemy LTs and STs are often found;
- easily illuminated by passing LTs at the beginning of the battle.
E6(bush in the village)  Advantages:
- a position for defense against the onset of the enemy, allowing you to shine the passage to your own base and part of the city;
Flaws:
F1(bush in the alley) 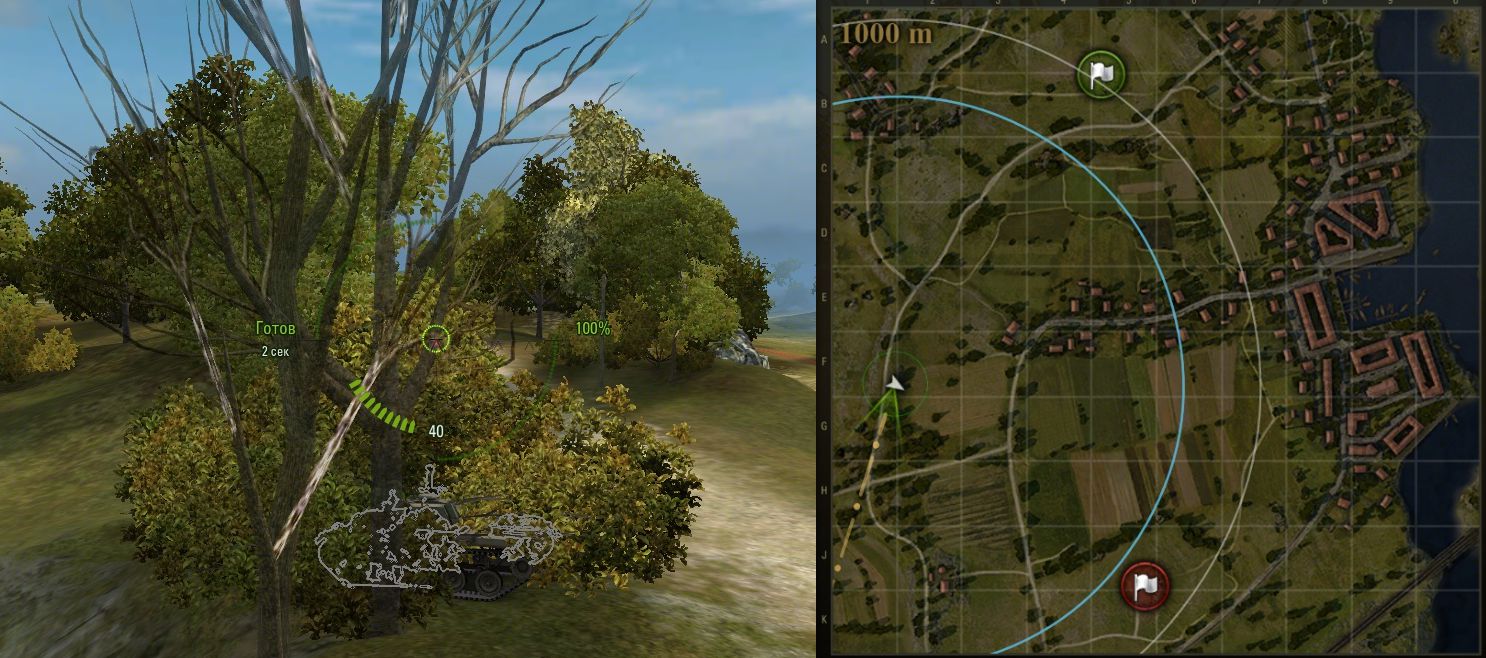 Advantages:
- extremely rarely occupy this position, suitable for illuminating the enemy on the 1st and 2nd lines, as well as the outskirts of the village;
Flaws:
- it is necessary to take a position at the very beginning of the battle;
- it is extremely difficult to change position without taking damage.
Video with LT positions - Rybatskaya Bay
Let's analyze the key position from the upper (northern) respawn:
G3(bush in the alley)

Advantages:
- a position for illuminating the enemy on the 1st and 2nd lines moving across the road;
- detection after firing of disguised anti-tank guns in square C1;
- light LT and ST of the enemy in the eastern part of the village;
- easy position change without possible damage.
Flaws:
- We are illuminated by the leaving LT and ST from the village.
E0(bush in the city) 
Advantages:
- an excellent position for illuminating the enemy in the city;
- detection of equipment on the 9th line;
- easy position change without possible damage.
Flaws:
- illuminated by the departing LT and ST in the D9 square
G4(bush in the field) 
Advantages:
- a position for defense against the onset of the enemy, allowing you to shine the exit from the city and village to the base;
- it is extremely difficult to light up at this point.
Flaws:
- it is extremely difficult to change position without taking damage.
The next material from a series of tactical reviews is devoted to the Fisherman's Bay map.
At first sight…
According to the first impressions, the map that appeared in the game about 4 months ago is the most favorable for playing on LT and PT. This is facilitated by its landscape features: a spacious central part with several buildings that play the role of shelter. By the way, the decision to make houses in the middle of the field was dictated by the disputes about Malinovka, which were popular at the time of the creation of Fisherman's Bay, where a deserted, well-shootable field promises only a quick drain, making such a large part of the map unplayable.
Good conditions are created along the edges of the map for realizing the advantages of TT (in the city) and PT (in the ravine). The city is located in such a way that it requires good organization from the teams, since a strong deepening of lonely tanks in its streets will threaten the environment, and the wrong choice of position will jackpot from enemy artillery and shoot enemies at you from every crack. And there are many, believe me.
The ravine, on the other hand, suggests a more cold-blooded and assiduous game. On both sides of the ravine, adjacent to each of the bases, there are excellent conditions for ambushes of PTs and sniper tanks, which can be considered the Germans. The area in the center of the ravine has several hiding places for hiding after light. By the way, artillery also likes to stand in the area of \u200b\u200bthe ravine, feasting on inattentive and restless enemies.
Now we will analyze each of the directions separately in more detail, highlighting the advantages and disadvantages of the terrain of each of the teams that loaded on one or another spawn.
Thanks to the center for this.
Fisherman's Bay is one of those maps where LTs are able to decide the outcome of the battle. It is on this map that LT owners begin to understand that armor thickness and gun penetration are not always the determining factors for victory.
The central area of the map (1) is certainly a strategic place, however, as practice shows, it only needs to be taken. And no more. Since further movement along open area to the enemy base often ends with a stupid drain of several tanks that can be useful in other areas. Moreover, the capture of the center is necessary to illuminate the enemy that has not yet left the base. And since with every second it travels farther and farther, the benefit of light disappears in the same progression. Therefore, the maximum benefit from the central part of the map is calculated in one or two minutes. Another thing is that, having met the enemy there, you will be involved in close combat in any way, losing, by the way, the precious 2 minutes that were discussed above.
Thus, it is more expedient to let the LT into the center, and not risk more powerful STs. And the task of Lt will not get involved in the battle, but, using its driving characteristics, illuminate the enemies creeping from the base to their positions, at the same time, leaving the shelling of enemies also trying to occupy the center of the field.
.jpg)
Having held out in the center for these moments, the LT will no longer be of any significant use there, and it would be unsafe to stay there due to the presence of enemies. Therefore, the next task of the LT will be to move to the ravine and illuminate enemy targets on it (2).
Ravine.
Having smoothly touched on the topic of the ravine, we proceed to its analysis. The tactics of conducting a successful battle here are simple: the most cold-blooded and diligent snipers will win, who will be helped by the most creative and dodgy LTs.
It should be noted that if on the side of the green base there are shelters in the form of buildings (2a), then on the side of the red base there are only thickets (2b), which implies a comparative manifestation of the initiative by the red ones. Since if they are the first to light them up, then they certainly can’t get away.
However, the side that succeeded in the middle of the ravine 2c) has not yet secured an advantage in its further capture. Since now comes the most difficult thing - moving forward, on the already brought down trunks of the enemy. Since most of the tanks on both sides are TDs, if you have light tanks left, it will be much easier. Nimble fireflies will be able to take down the turmoil in the ranks of the enemy with their appearance, diverting them to themselves, thus giving you time to target the most vulnerable places. Having an advantage in a couple of shots, it will be easier for you. Plus, allied artillery will help, just waiting for the enemy to make a mistake in the confusion and leave for an open place.
City.
The city on the Fisherman's Bay, as mentioned above, is located in such a way that it will not tolerate inattention, imposingness and excessive self-confidence from the player. Many streets and inconspicuous positions around the bay itself (1) are an extreme danger. The most inattentive opponent comes under fire from all sides and is eventually taken into the “pincers”. Also, do not forget about artillery. Being in the light, you need to clearly understand its approximate location and calculate whether your tank is in the place of its potential shelling.

In most cases, TTs in the city do not collide at the bay, but a little closer to the center, as shown on the map. Since there each other has less room for any maneuver. This is the choice of random players. Do not risk yourself and hope that the enemy will not dare to risk it either.
However, the battle in the city is not always limited to this clash. More and more often, the most daring players still try to take advantage of existing positions and surround the enemy. This is most often done by more maneuverable CTs, for whom artillery is not so scary.
Base defense.
Fisherman's Bay, as practice shows, first of all, a map for protection. In addition, there is a desert area around each of the bases, which can be shot from shelters located not far from the respawns. Often the most hopeless battles were drawn out in this way. It is only necessary to provide a reliable rear from the side of the ravine. That is, there must be at least 1 of your ally. You, armed with a stereo tube and using bushes and boulders, will be able to destroy an unsuspecting enemy even on the approaches to your base. This is all shown in the figure below. Moreover, no matter where the enemy comes from - from the center or from the city. It is completely open. You will be able to use your cover for the duration of the reload if you are still noticed.

A certain tactic also comes from this feature of the map - the rush of the whole team along the ravine, while 3-4 tanks or anti-tank units are located near the base and successfully defend it. While the enemy TTs slowly and cautiously pass the city, your allies will be able to seize the initiative in the ravine. And when they find themselves at the base of the enemy, the enemy TTs will only just begin to leave the city. Do not be afraid of their level and numbers, because you just need to knock down the capture to the difference that ensures the victory of your team. Do not take risks and do not climb on the rampage. You can even let the enemies take over the base for a bit, and then suddenly appear from cover and strike at an unsuspecting enemy. The game will be done.
Conclusion:
Fisherman's Bay is another map from the "to each his own" series. That is, it has several directions of attack, the features of which will appeal to only a strictly defined type of equipment. The review also highlights some non-standard combat options based on the features of the map. However, this will lead to success only with the coordinated action of the entire team and a clear understanding of their tasks for each player.
Fisherman's Bay on the map. As in other guides, we will look at all types of vehicles and their main routes of movement, so that beginners know where enemy vehicles are most likely to attack.
Light tanks on this map mostly shine from the center, there are cases when enemy light tanks drive through the city or on the left side through a ditch. There is a road in the center of the map and a small number of buildings behind which a light tank can hide, which is why some LT players stop in the middle and periodically crawl out from behind the buildings, highlighting enemy vehicles. All major movements of light tanks are shown yellow arrows.
Tank destroyers on this map can move in two directions, as indicated by green arrows, or stay at the base in defense, indicated by green circles.

Medium tanks on the map Fisherman's Bay in an action game World of Tanks moving in all directions. On this map, they can be expected from almost any direction. ST movement showing blue arrows. But still, if you paint the movement of STs by priority, then most likely medium tanks will go through a ditch or through a city, the chance that medium tanks will go through the center is slightly lower. Cases of medium tanks driving through the center are quite common in high-level battles, where the role of a firefly is played by medium tanks, in particular the T-54, the second panther and the E-50 (although it is not the best light).
Artillery in online game World of Tanks on the map, the Fisherman's Bay becomes the places indicated purple circles. In principle, finding art on this map is not difficult, since the territory is open with a couple of bushes.

Heavy tanks on the map Fisherman's Bay move in two directions: through the city and through the ditch, shown by red arrows. Major battlefields like heavy tanks, and other techniques are marked on map with red circles.
Rush on this map is not very popular, but sometimes there are teams that decide to go on the attack together. The best Rush tactic route on this map is through the center as shown white arrows. This is the fastest and easy way get to the enemy base.


